Create watch pages and generate mapping
Applications loaded on Climatix include watch pages that provide setpoints, present values, and other data.
Application engineers use the SCOPE tool to create the watch pages and download the generated file (OBHcomp.ucf) to the controller.
As soon as the Climatix controller is connected to Climatix IC, the controller provides the defined information, derived from the watch pages, among others.
The example below demonstrates how to create a watch page in the SCOPE tool, add values to it and, finally, download it to the controller.
In the field, existing plants often already have a watch page with cloud-capable data.
Create watch pages
|
|
|
- SCOPE tool is open and connected to the controller.
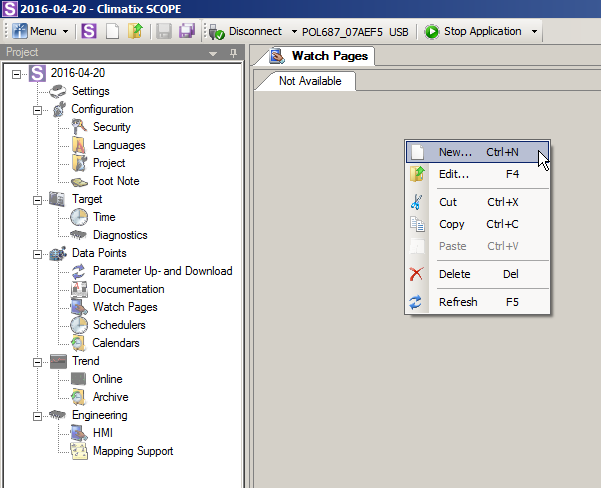
- In the project tree, go to Data Points > Watch Pages.
- Right-click the bar below the Watch Pages tab and select "New...".
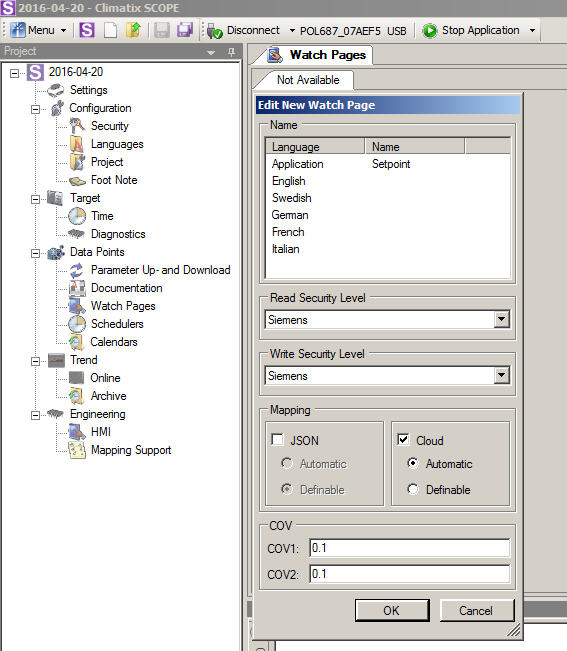
- The "Edit New Watch Page" dialog box opens with the standard selection application and page.
- Change the name page to a name of your choosing by right-clicking around the page and selecting Edit.
- Select the desired security level for the connected client. In other words, the Cloud application required certain access rights.
- In the Mapping dialog pane, JSON is possible in addition to the selection "Cloud" (mandatory for the task described here). JSON is required for the 'Device REST API'.
- You can also select in the dialog pane, whether to automatically generate names or define them yourself. We recommend "Automatic".
Add values to a watch page

- A watch page is setup.
- In the SCOPE tool, the "Browser for Data Points" is open and shows plant data points.
- Select the desired Member (e.g. the PresentValue) for a data point and drag the Member to the watch page workspace.
- The "Edit New Watch Item" dialog box opens.
- In the "Edit New Watch Item" dialog box, you can assign access rights that differ from the watch page (only recommended as an exception).
- The settings are inherited from the watch page settings if neither JSON nor Cloud is selected.
- Complete the settings with OK.
- You can now set up additional watch pages with data points that you would like to view on Climatix IC at a later date.
- Save the changes to the watch pages with a save button ("Save current tab" for the current watch page or "Save all tabs" for all changes to all watch pages).
The following illustration is an example:

Generate cloud mapping
The next step is to generate the final mapping files (OBHcomp.ucf) from the watch pages with their data points and then download them to the controller.
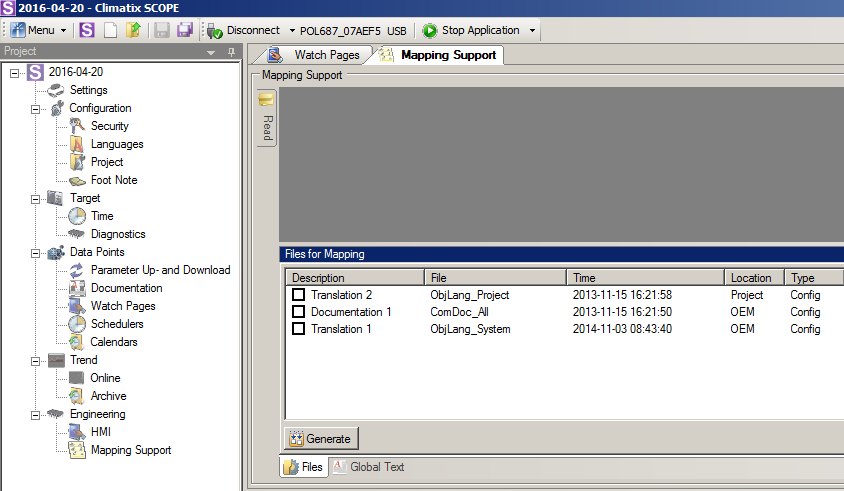
- In the SCOPE tool, go to the project tree "Engineering > Mapping Support".
- Right-click below the available lines in the Mapping Support workspace.

- Select "Import and Export > ← Import"
- Another line "Mapping x" is created.
- In the File column, select "GenericCloud" from the list box and click outside it so that the line is fully created.

- Repeat the last step, but this time select "GenericLang".

- Double-click "GenericCloud" to display and review mapping of the watch pages and associated data points.

NOTICE

No changes in mapping support
Changes and translations are made exclusively in the actual watch pages. The table view for mapping support is for viewing and review only.
You must refresh the table view (F5) before saving the mapping if the mapping support table view is open while changes are still being made to the watch pages.- Click the diskette symbol on the tool to save changes made to mapping.
- Saving generates the mapping file OBHcomp.ucf in the background.