Uniform text concept for alarm types is available.
The 'Alarm type' view is open.
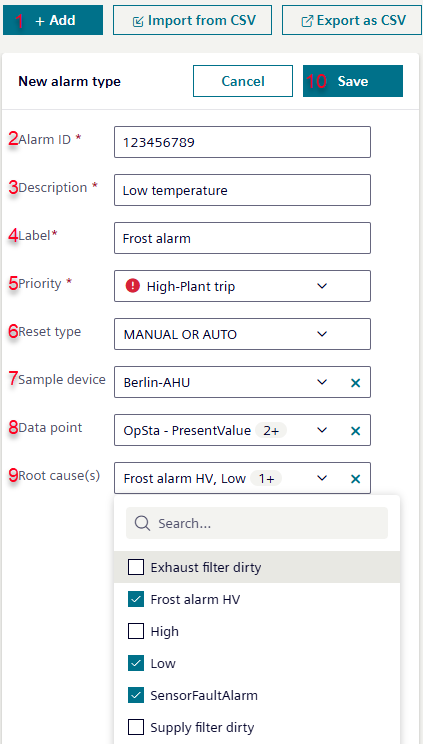
Select ‘+ Add‘ (1).
The 'Alarm type' dialog box opens.
In the Alarm ID field, enter the ID number of the corresponding alarm (2).
A corresponding alarm must be triggered on the device (e.g. supply air fan fault) in order to enter Alarm ID. INFO: A new alarm type is created the first time an alarm is triggered; Climatix IC fills out the type using available information. Automatically generated alarm types must be modified.
Alarm ID is always the same within an application type (e.g.: AHU1) and does not need to be regenerated each time. INFO: Another Alarm ID is, however, generated on the same functions (e.g. supply air fan fault), but for a different application type (e.g. AHU2).
Enter a description of the alarm in the 'Description' (3) field. This description is issued as the alarm text.
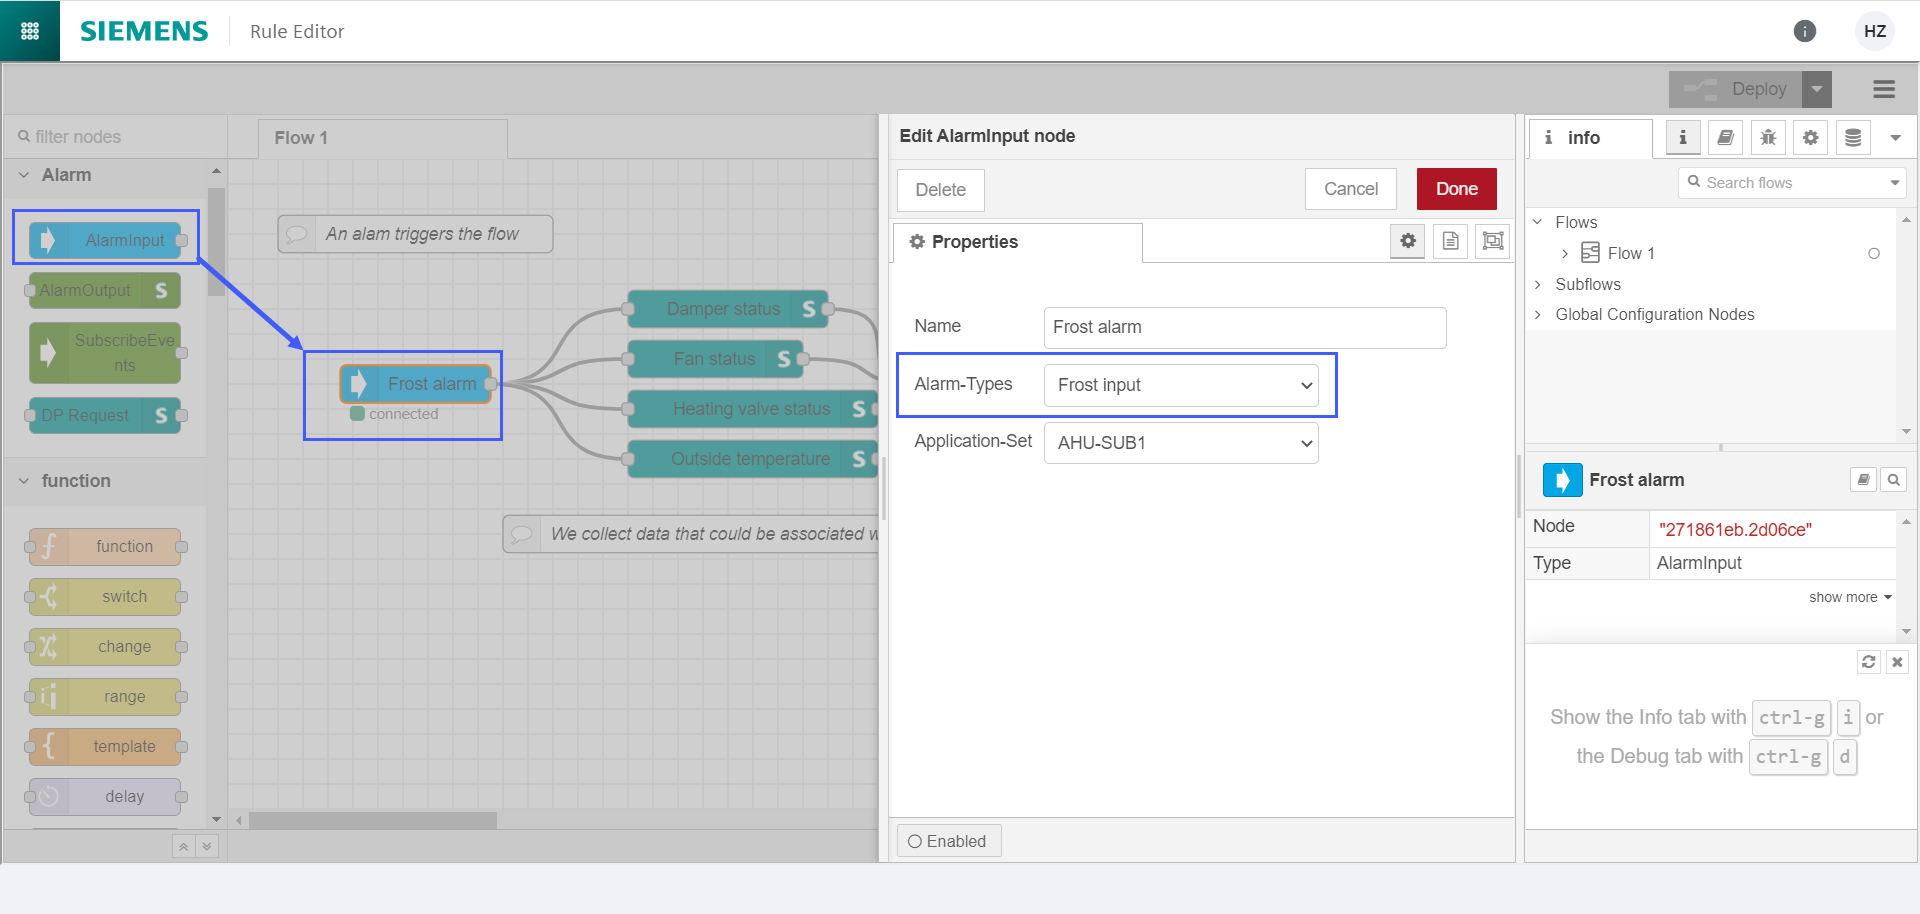
Enter a label for the alarm in the 'Label' (4) field. Use the designation name in from the Rule Editor, entered while configuring the property "Alarm types”for the alarm input node (see 'Rule Editor menu').
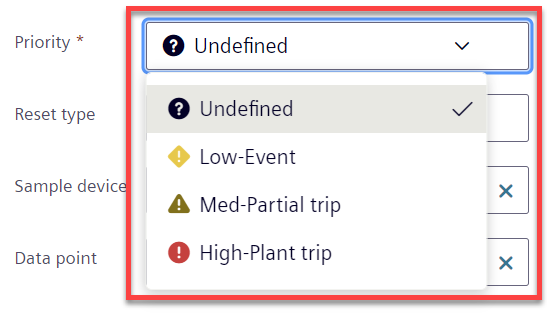
Set the alarm priority in the 'Priority' field (5).
Select the priority level from the drop-down menu:
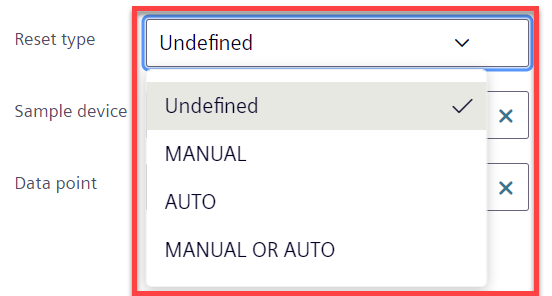
Set the type of reset for the alarm in the 'Reset type' (6) field.
Select the reset type from the drop-down menu:
Select the plant in 'Sample device' (7) that serves as the example for the new alarm type.
Select the previously selected plant in the 'Data points' field (8) as the template for the new alarm type.
Click multiple data points as needed.
Max. 6 data points can be selected at the same time.
The selected data points are displayed as a data point value and as a chart on the plants that show the alarm type (see chapter 'Details', 'Chart').
Select a root cause for an alarm in field 'Root causes'.