Plant settings
Basic settings
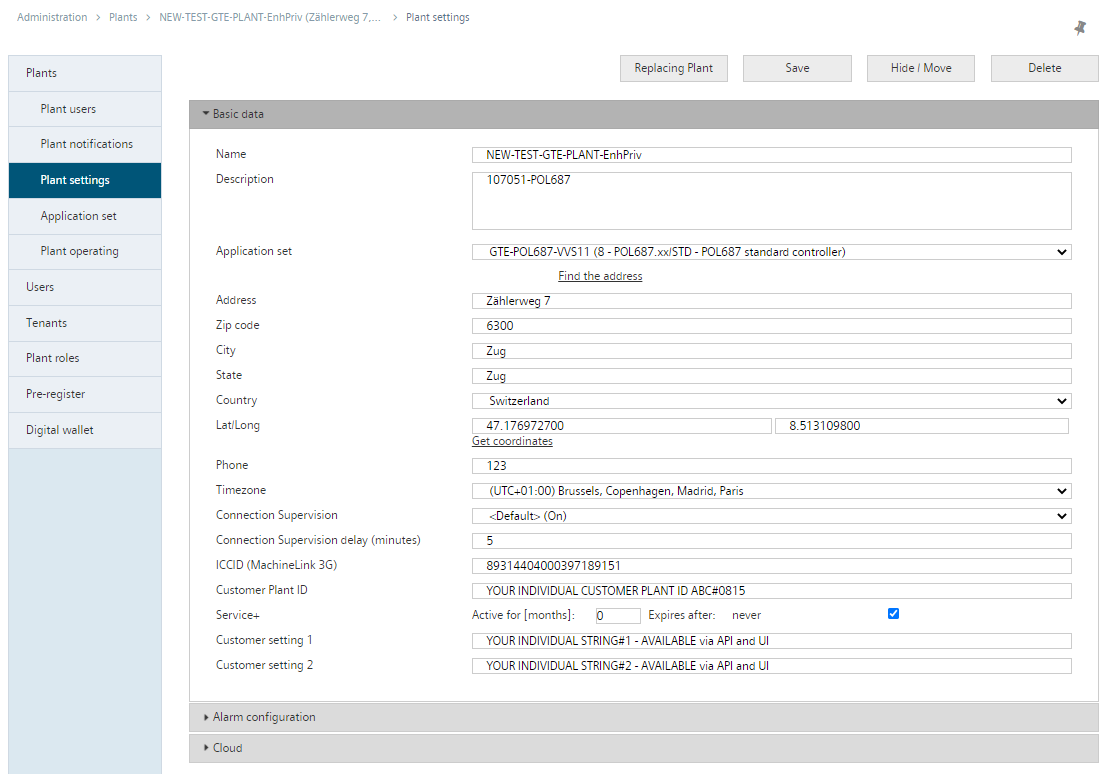
Plant information identifies the plant and renders it easier to find, for example, applying a filter to lists with plants (see 'Advanced filter search by plants with an alarm').
Entries are made manually or automatically (for how to proceed, see "Default data for plant settings") during initial activation. Some notes on the entries:
- The plant name replaces the generically generated name as used.
- The Tenant-Administrator can preset restrictions on the naming of plants, for example, by excluding certain characters or prevent duplicate plant names within the Tenant. See Basic data/Tenant key (distributor), paragraph 'Plant names: Use of impermissible characters and duplicate plant names'
- In the 'Description' field, you can enter any text depending on the set language.
- The description can be queried via API by language.
- For additional details: See Swagger documentation under 'Menu Apps > Developer API'.
- The application set is important for upgrades, defining user access level, etc.
- Plant-related properties (e.g. address, city) are required for sorting, grouping, and searching.
- Use "Get coordinates" to find your plant's longitude/latitude. Your plant cannot be displayed on the "Map" if this information is unavailable!
- 'Planned tasks' and the timestamp for alarms only operate after changing to the correct time zone. When selecting a plant address using 'Find the address', the time zone of the plant is set automatically (see 'Find address').
- The ICCID number is a unique ID for your SIM card. The entry leads to an online symbol with 3G supplement and display of the ICCID number as a tool tip.
- Customer plant ID is an empty text field that permits the customer to enter text. You can search and group plants by an internal numbering system.
- Customer setting 1 and 2: Individual string; usable via API and user interface.
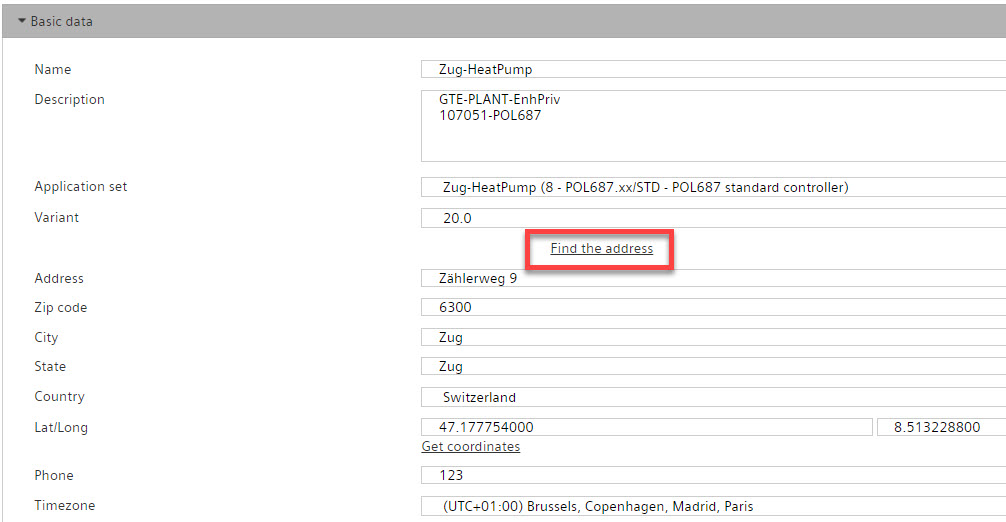
Find address
- Click 'Find the address'.
- The 'Select address' dialog opens.
- Enter the address where the plant is located and click 'Browse' (1).
- A list of possible matches opens.
- Check the displayed addresses for correctness by clicking the address (2).
- The external Google maps service opens in a new browser and displays the address on the map.
- Select the correct location by clicking 'Apply address' after your desired address (3).
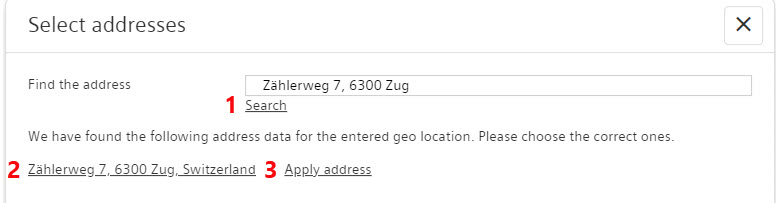
- The selected location is entered in the plant's basic settings.
- The correct timezone for the plant is entered in the plant's basic settings.
- The plant is displayed on the map on the Dashboard
Service+
On an existing Service+ subscription, you can select unlimited ("Expiration: Never") or for a select number of months ("Active for [n] months, expires on <date>"). Additional information on Service+ is available in the glossary.
Basic settings:
- -1: Service+ is not activated, but the first month/year is active as a free trial month or year.
Setting options for the service period after login:
- 0: Service+ is permanently activated, in addition, the first month/year is active as a free trial month or year.
- ≥1: Service+ is active for the number of months/years set, in addition, the first month is active as a free trial month or year.
After selecting the new period, a new window opens in which the newly selected expiration date must be confirmed by Service+.
You receive an e-mail notification 14 days, 7 days and 1 day in advance as the Service+ reaches its expiration date.
A Tenant-administrator can change or end the preset subscription period of Service+ at any time. The period can differ from the e-mail notifications sent the system.
- For example if a user enters the wrong subscription period for Service+.
- Or if a user stops payment for Service+ prior to expiration of the service.
Connection supervision
Activate an alarm notification for a connection failure in excess of 5 minutes:
- In the basic data, select "Connection supervision": On.
- In secondary navigation, select the "Alarm notifications" menu.
- Click "Add alarm notification".
- In addition to the text, it is the recipient e-mail address that is particularly important under Basic settings.
- Under Alarm classes, select "Alarm class 4" (Connection Supervision) only.

The Tenant administrator can change the default setting for connection supervision. This takes place at "Administration > Tenants > 'my Tenant' > Basic data > Connection Supervision (Default)"
Alarm configuration
Each plant can have its own alarm configuration. The settings apply:
- in general, to the plant
- to each reconnect
Cloud
The Cloud section has informative data. The activation key plays an important role for "Delete, hide, and replace plants".